The ‘Payment Summary’ page is where you can find a list of the Payments associated with Milestones. Some milestones like PROs and Biosamples may have payments attached to them. As you complete milestones, you can see which milestones have payments by checking out the Payment Summary Page.
Note: The Payment Summary page displays the details for all milestones for all studies you may be enrolled in.
To get started, click on the ‘Payment Summary’ icon on the left side menu. This shows the payment summary for the completed milestones that you have been compensated for.
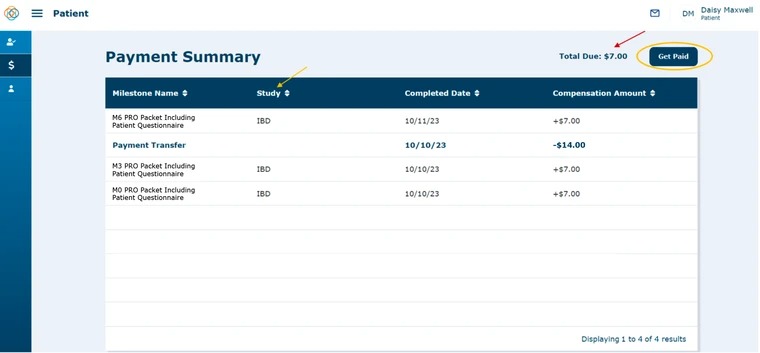
The table here displays the milestone name, the study, when you completed the milestone, and the amount of compensation. It is organized so your most recent earnings and actions appear at the top of the table. Payments earned are marked with a “+” and when you choose to get paid, you can see in the screenshot above that there are Payment Transfer rows marking when you have been paid out, with those amounts marked with a “-”, similar to a bank statement.
Click on the ‘Get Paid!’ button to select how you would like to get paid. If a digital account(s) exists, then you should select how you want to get paid. This is mentioned more in below detail but only select the ‘Get paid by site’ option if the site has informed you that they can pay you through the site.
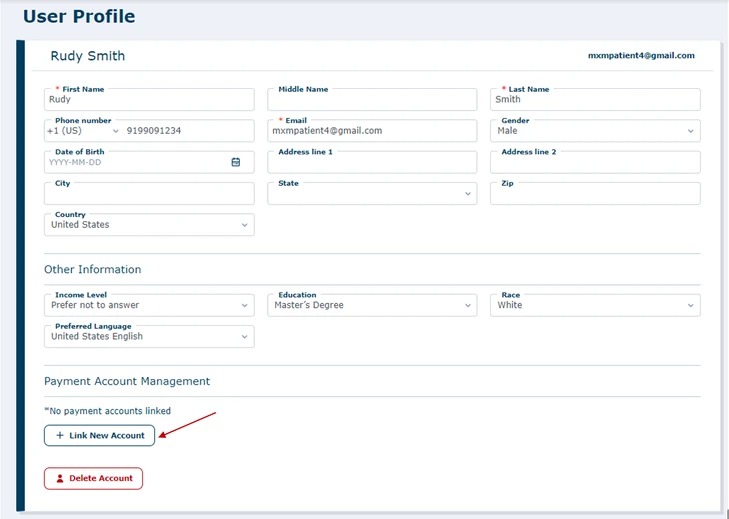
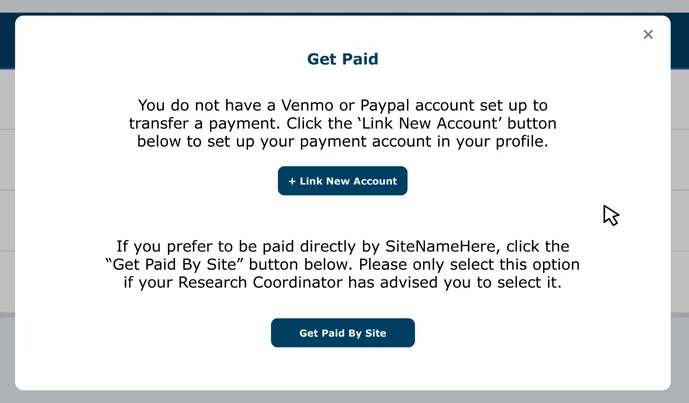
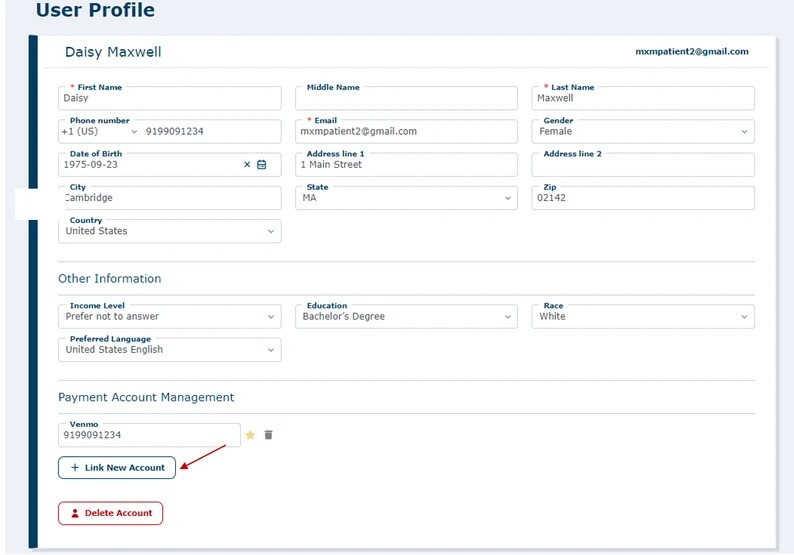
If there are no digital accounts set up to transfer payments click on ‘Link New Account' to link a new PayPal or Venmo account. Please refer to the ‘Payment Account Summary' section further down in the document for more detailed steps. If you press ‘Link New Account’ you will be navigated back to the User Profile screen where you can click on ‘Link New Account’.
Alternatively, you can select ‘Get Paid by site’ instead of through a digital account. This is mentioned more in below detail but only select the ‘Get paid by site’ option if the site has informed you that they can pay you through the site. When selecting this option, you will receive the below message boxes to check that your site supports site payments. Press ‘Done’ to get paid by the site. Press 'X' to cancel out of this process.
Note: In some cases, the site that is running your study might not have Site payments available. If this is the case, the site will inform you that they cannot pay you through the site and you must get paid digitally through the app using Venmo and PayPal, in cases like these please do not select the get paid by site option in the get paid workflow. If your site has informed you that they do have site payments available, then you can choose the option to ‘get paid by site’. If no payment instructions were given, then choose the payment method that best suits your needs.
The system will have a second level of validation after initially clicking Get Paid By Site to make sure that you are sure that your site allows site payments as an option.
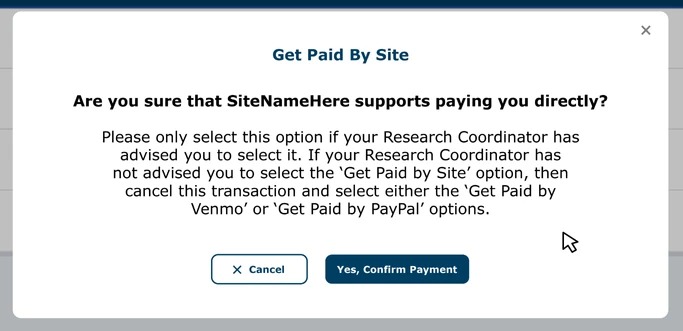
Click on “Yes, Confirm Payment” if your site supports payments to patients, or click “Cancel” to close out of the process and choose another payment method.
If you click on “Yes, Confirm Payment” you will get a success message similar to the one below.
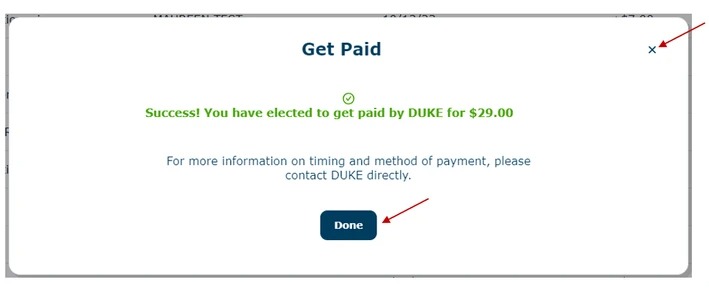
If you choose to get paid by the site, then you need to go to the site in person to receive compensation.
Payment Account Management:
- Edit or enter your profile information, for example: Phone Number, Email, Date of Birth, Address, etc. and click 'Enter' to update the information.
- Link, unlink, and set a primary account
- By default, the primary account will be associated with the first linked account or the only account
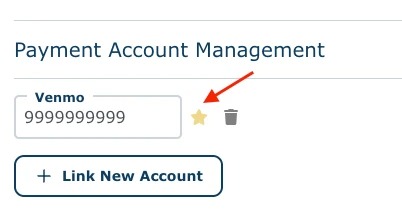
- Allows you to change your primary account (when more than one account is added)
- Click on the star icon next to the account you would like to select as the primary account.
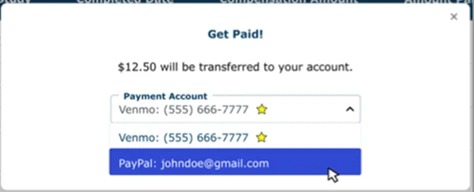
- When you click on 'Get Paid' on the payment summary page, it will automatically display the Primary account before submitting the request to get paid. You can always change the account you would like to get paid to by clicking on the dropdown and changing the account you would like payment to go to.
- Click on the star icon next to the account you would like to select as the primary account.
- Allows you to link multiple payment types
- Allows you to delete linked payment accounts
- Click on the delete trash can icon to remove any payment accounts.
- Click on the delete trash can icon to remove any payment accounts.
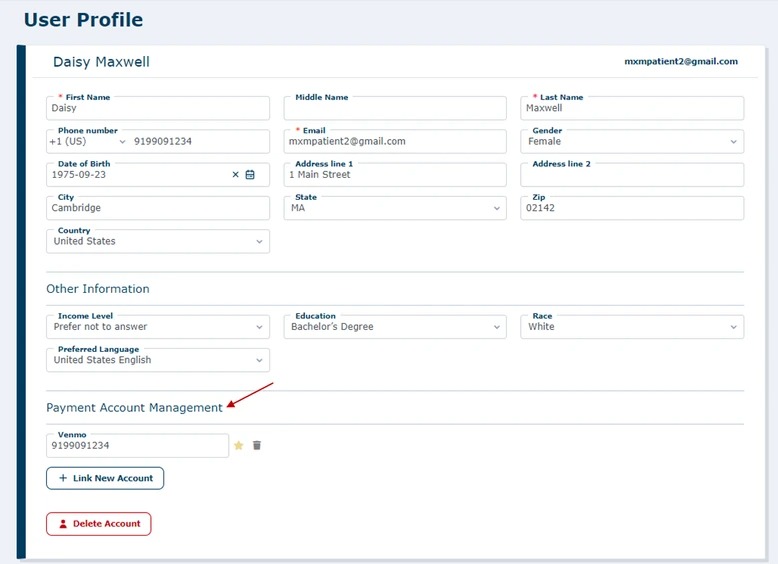
Click on 'Link New Account’ to set up accounts to receive payments.
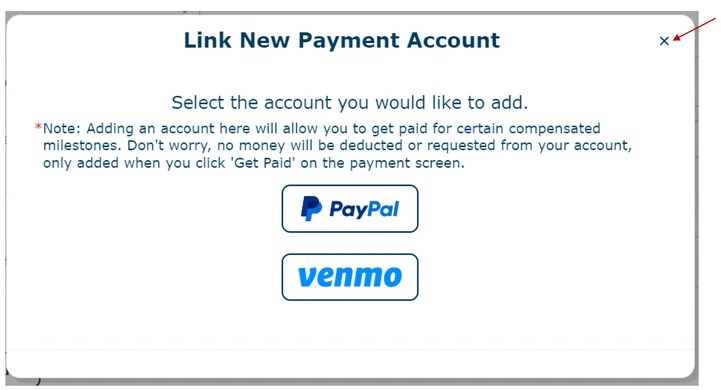
Once you click on ’Link New Account' as seen above, you will be presented with the below message box.
Note: Click on the 'X' in the top right corner if you want to cancel out of this screen.
Watch a tutorial video on how to get paid:
Watch a tutorial video on how to link payment accounts: